How many times have you seen someone wear a shirt or carry a tote bag with a custom design or text printed on it? It looks super-cool, no doubt about that. But as much as you want something like this for yourself, you may consider getting a custom shirt or tote bag an unnecessary waste of money. What if we told you that you could make them yourself, at home? All you’ll need to do it yourself is a freezer paper stencil.
Freezer paper stencils are a great way to transfer the text or designs of your choice on any medium, be it a shirt, tote bag, a canvas, or anything at all. Finally, you can do all of this without having to spend a penny!
If you can’t wait to know how you can do it all at home, you should dive deeper into this blog post right away. This blog post is all about freezer paper stencils!
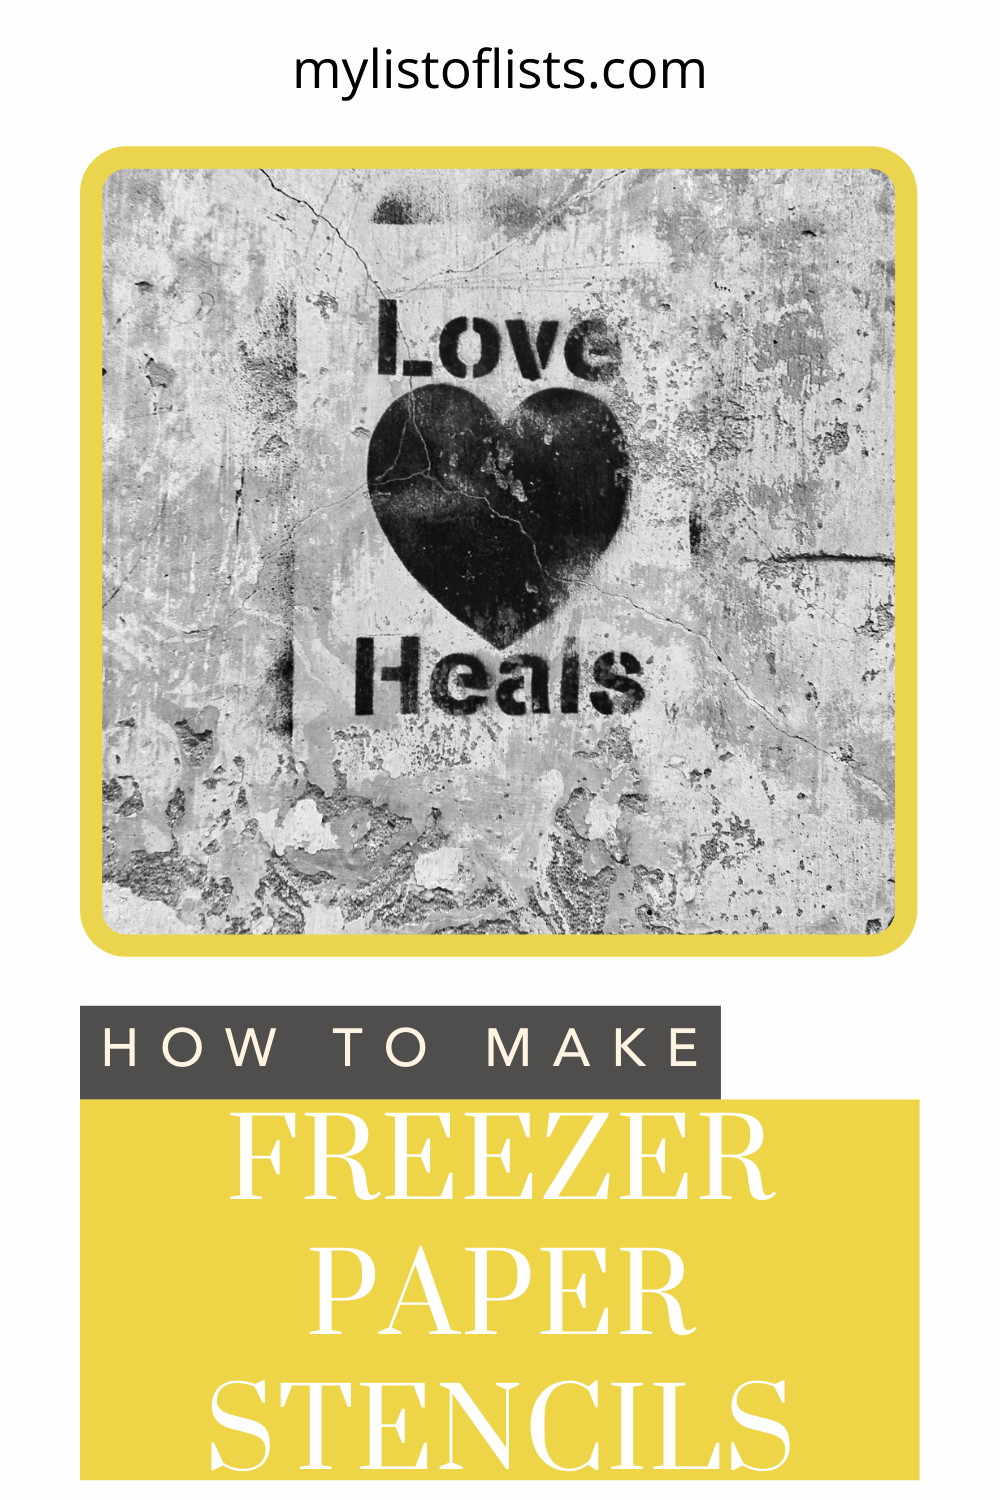
What is a Freezer Paper Stencil?
The first question that you may want an answer to before anything is what a freezer paper stencil is. These are simple stencils that you cut out using a freezer paper. Freezer paper is thick and has a wax or plastic coating on one side and a regular finish on the other. It’s not the same as the parchment paper that has no coating on either side and wax paper that has a wax coat on both of its sides.
How Does Freezer Paper Stencil Help in Crafting Projects
Just like any other stencil, you place a freezer paper stencil onto the material you want to make the design on and paint it. Although it sounds simple and straightforward, which it is, there’s one thing that makes these stencils different. Place the stencils onto the material that you want to design such that the coated side is facing downwards. Then, you apply dry heat to the stencil to melt the coating and make the stencil adhere to the material that you want to design. Finally, you can start painting it once you’ve secured the stencil in place and peel it off when done.
It’s that simple!

How to Make Freezer Paper Stencils
The next question that you may have on your mind is how to make these stencils. Well, it’s pretty simple to make them.
Making Freezer Paper Stencils Using Cricut Machine
Cricut machines are a blessing in disguise for crafters. It helps you cut out any design that you like on the web or make yourself using any design software. All you’ve got to do is connect your Tablet or iPad to the Cricut machine and prompt the machine to cut the design out for you. A Cricut machine cuts designs to absolute precision, no matter how simple or complicated it is.
Making Freezer Paper Stencils Yourself
If you don’t have a Cricut machine, you need not worry. You can make freezer paper stencils yourself. One of the many reasons why crafters love freezer paper is it’s super easy to cut it using a craft knife. Choose a design that you want and print it out on the freezer paper using a regular printer or draw it yourself – whatever you find easier to do. All you’ve got to do after this is cut the design out using a sharp craft knife skillfully, making sure you don’t cut yourself. It may seem like a difficult way to make freezer paper stencils, but it won’t feel difficult once you learn to use a craft knife.

Step-by-Step Guide to Using a Freezer Paper Stencil
Now that you know how to make freezer paper stencils, let’s move on to the main event. Here’s a step-by-step guide to walk you through the process of applying these stencils.
Step 1: Ironing the Stencil
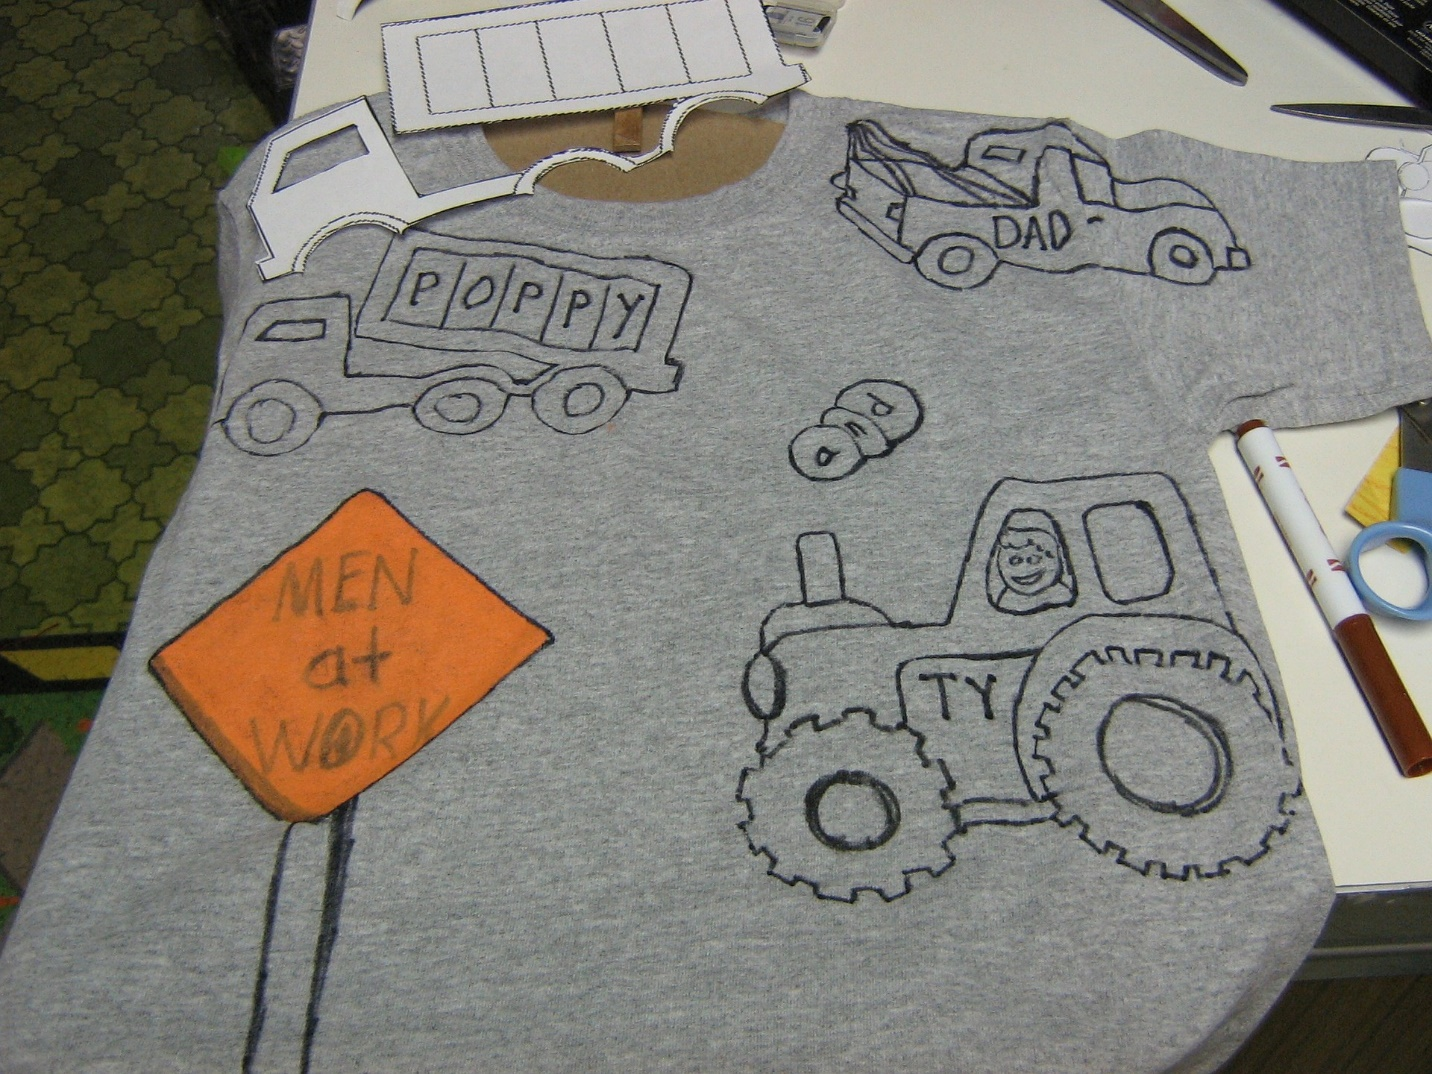
Firstly, place the freezer paper stencil on the material you want to make a print on and iron it. Pay close attention while you’re ironing the freezer paper to make sure all the edges of the stencil are sealed. The paint may make its way underneath the stencil if any edge is left unsealed. As a result, the final print won’t be neat and sharp. It’ll be messy and unattractive.
Step 2: Slide a Piece of Cardboard into the Material You’re Making a Print On
Next, if you’re using your stencil to print a design on a material that’s soft, like a shirt or tote bag, slide a piece of cardboard into it to make it stiff. By doing so, you’re ensuring that the material doesn’t bend and your stencil doesn’t get dislocated.
Step 3: Start Filling the Stencil with Paint
Now, you can use a paintbrush or a dauber to fill the freezer paper stencil with paint. To begin, tap off the excess paint from the brush or dauber and start filling in the stencil. Moreover, if you use too much paint, it might warp the freezer paper. Once that happens, the stencil will no longer stay stuck to the surface, and the final print will look extremely amateur.
Step 4: Remove the Stencil
This step will define the quality of the print. Peel the stencil off right away after you’re done filling the stencil with paint. Don’t wait for the paint to dry. However, be very careful while peeling it off. The chances of wet paint spreading are quite high. Therefore, you want to pay close attention while you’re at it.
Step 4: Dry the Paint
You can either leave the paint to air dry or employ heat drying with a dry iron to speed up the drying process. Make sure to let it sit undisturbed till it’s completely dry. Moreover, you don’t want to smear the paint and ruin all your hard work.
Where Can You Use Freezer Paper Stencils
Freezer paper stencils are excellent tools for crafters. This is especially true for those that like to add a touch of art and creativity to everything. Finally, you can use freezer paper stencils in plenty of crafting projects. You can use them to print images on your t-shirts, wall hangings, quilts, handkerchiefs, tote bags, and anything else that you can think of. The possibilities are endless!
Leave a Reply