Just the other day, I was scouring Dollar Tree looking for cheap crafts supplies when I stumbled on a pack of plastic hangers. Suddenly, an idea hit me. If arranged correctly, those hangers could end up looking like a really epic snowflake! Check out my easy tutorial below for this plastic hanger snowflake DIY.
Plastic Hanger Snowflake DIY: How To Make
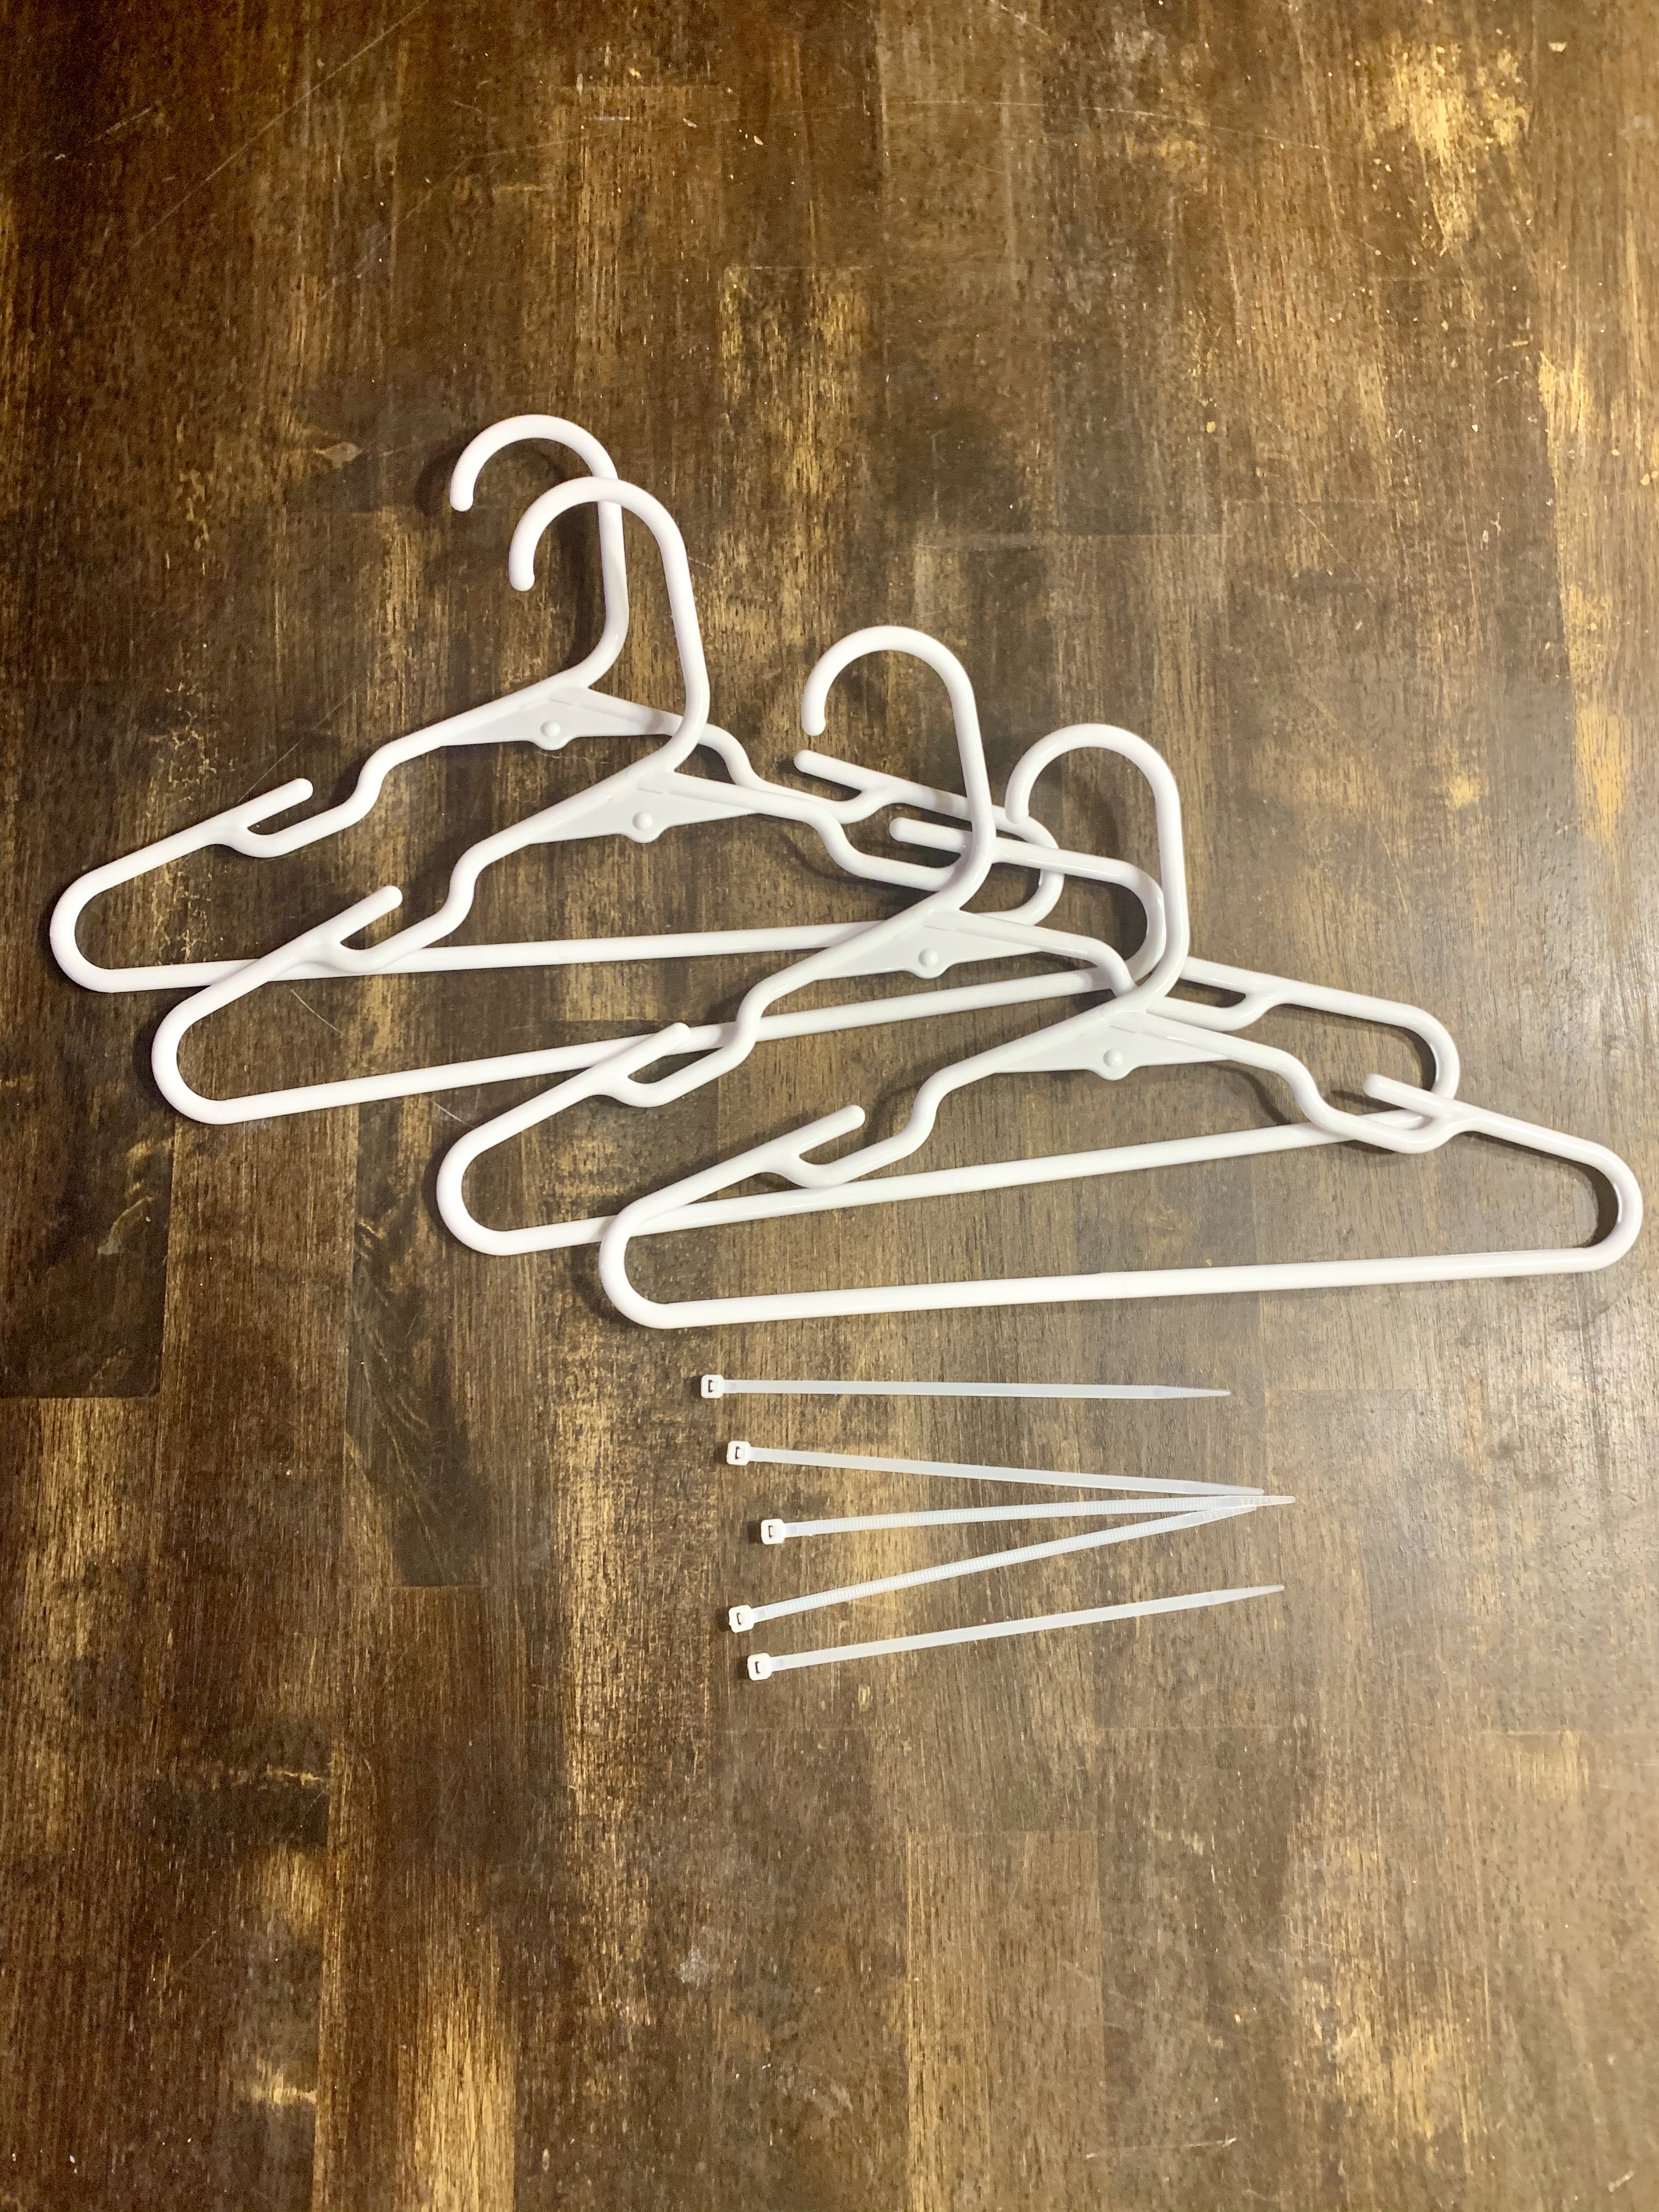
To make your own snowflakes out of plastic hangers, you need only the right tools. Most of which can be found at the Dollar Store! Plastic hangers and zip ties will be your two most-used items, and I recommend picking up a new pair of utility scissors if yours could use a little sharpening. You’ll want sharp scissors to cut the zip ties as close to the hangers as possible. Additionally, you can paint your snowflake in your desired color, but it’s often tricky to paint plastic hangers evenly. Because of this, I recommend that you use only white hangers for this DIY holiday project. Check out the steps below to learn how to make your own and don’t forget to share your finished product with me by commenting below.
Here’s What You’ll Need
–Plastic hangers (for this DIY hanging snowflake you can use adult or kids hangers)
-Metallic spray paint
-Zip ties
-Glitter (optional)
-Mod Podge (optional)
Plastic Hanger Snowflake DIY: Steps
Step One
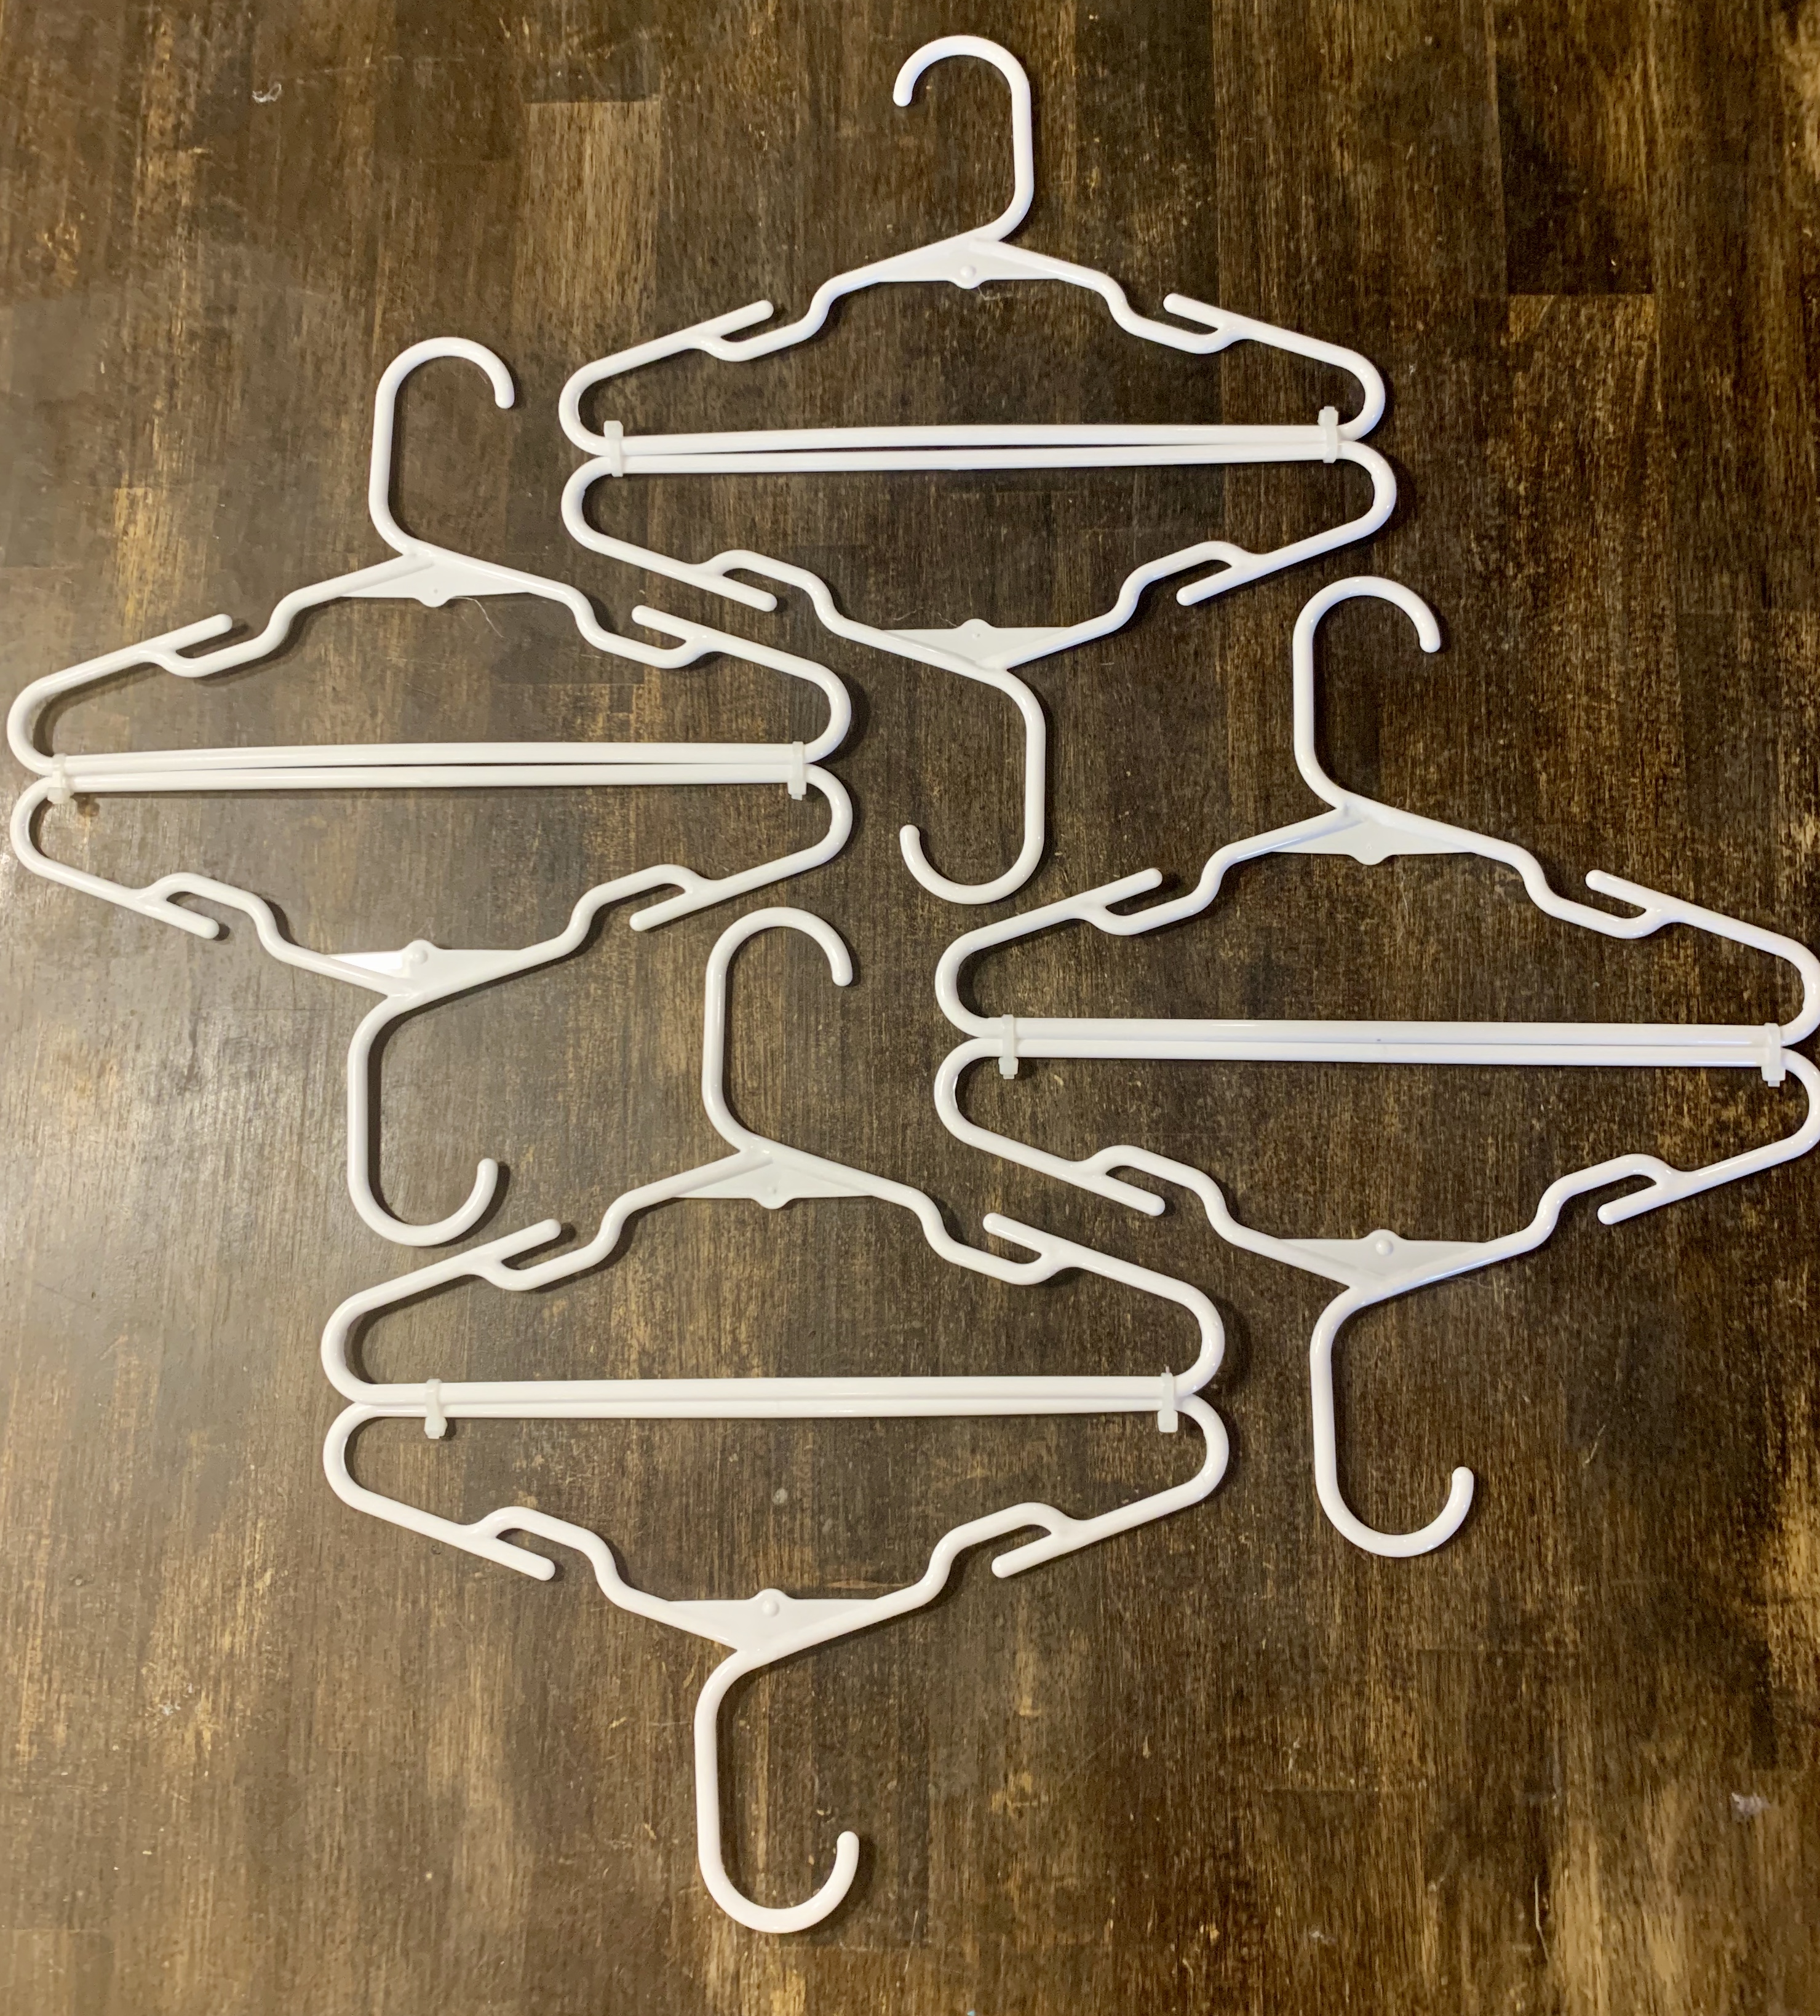
For the base of the snowflake, use eight hangers. Pair them two at a time, so the long bottom sides are together. Repeat the process four times, or until all 8 hangers are used. Arrange the four pairs so that the hook of the hanger is facing away from the center. It should create a design like a snowflake arm when done correctly. Repeat the process so that all eight hangers are used and all are arranged into a pretty snowflake. See my image below if you are confused!

Step Two
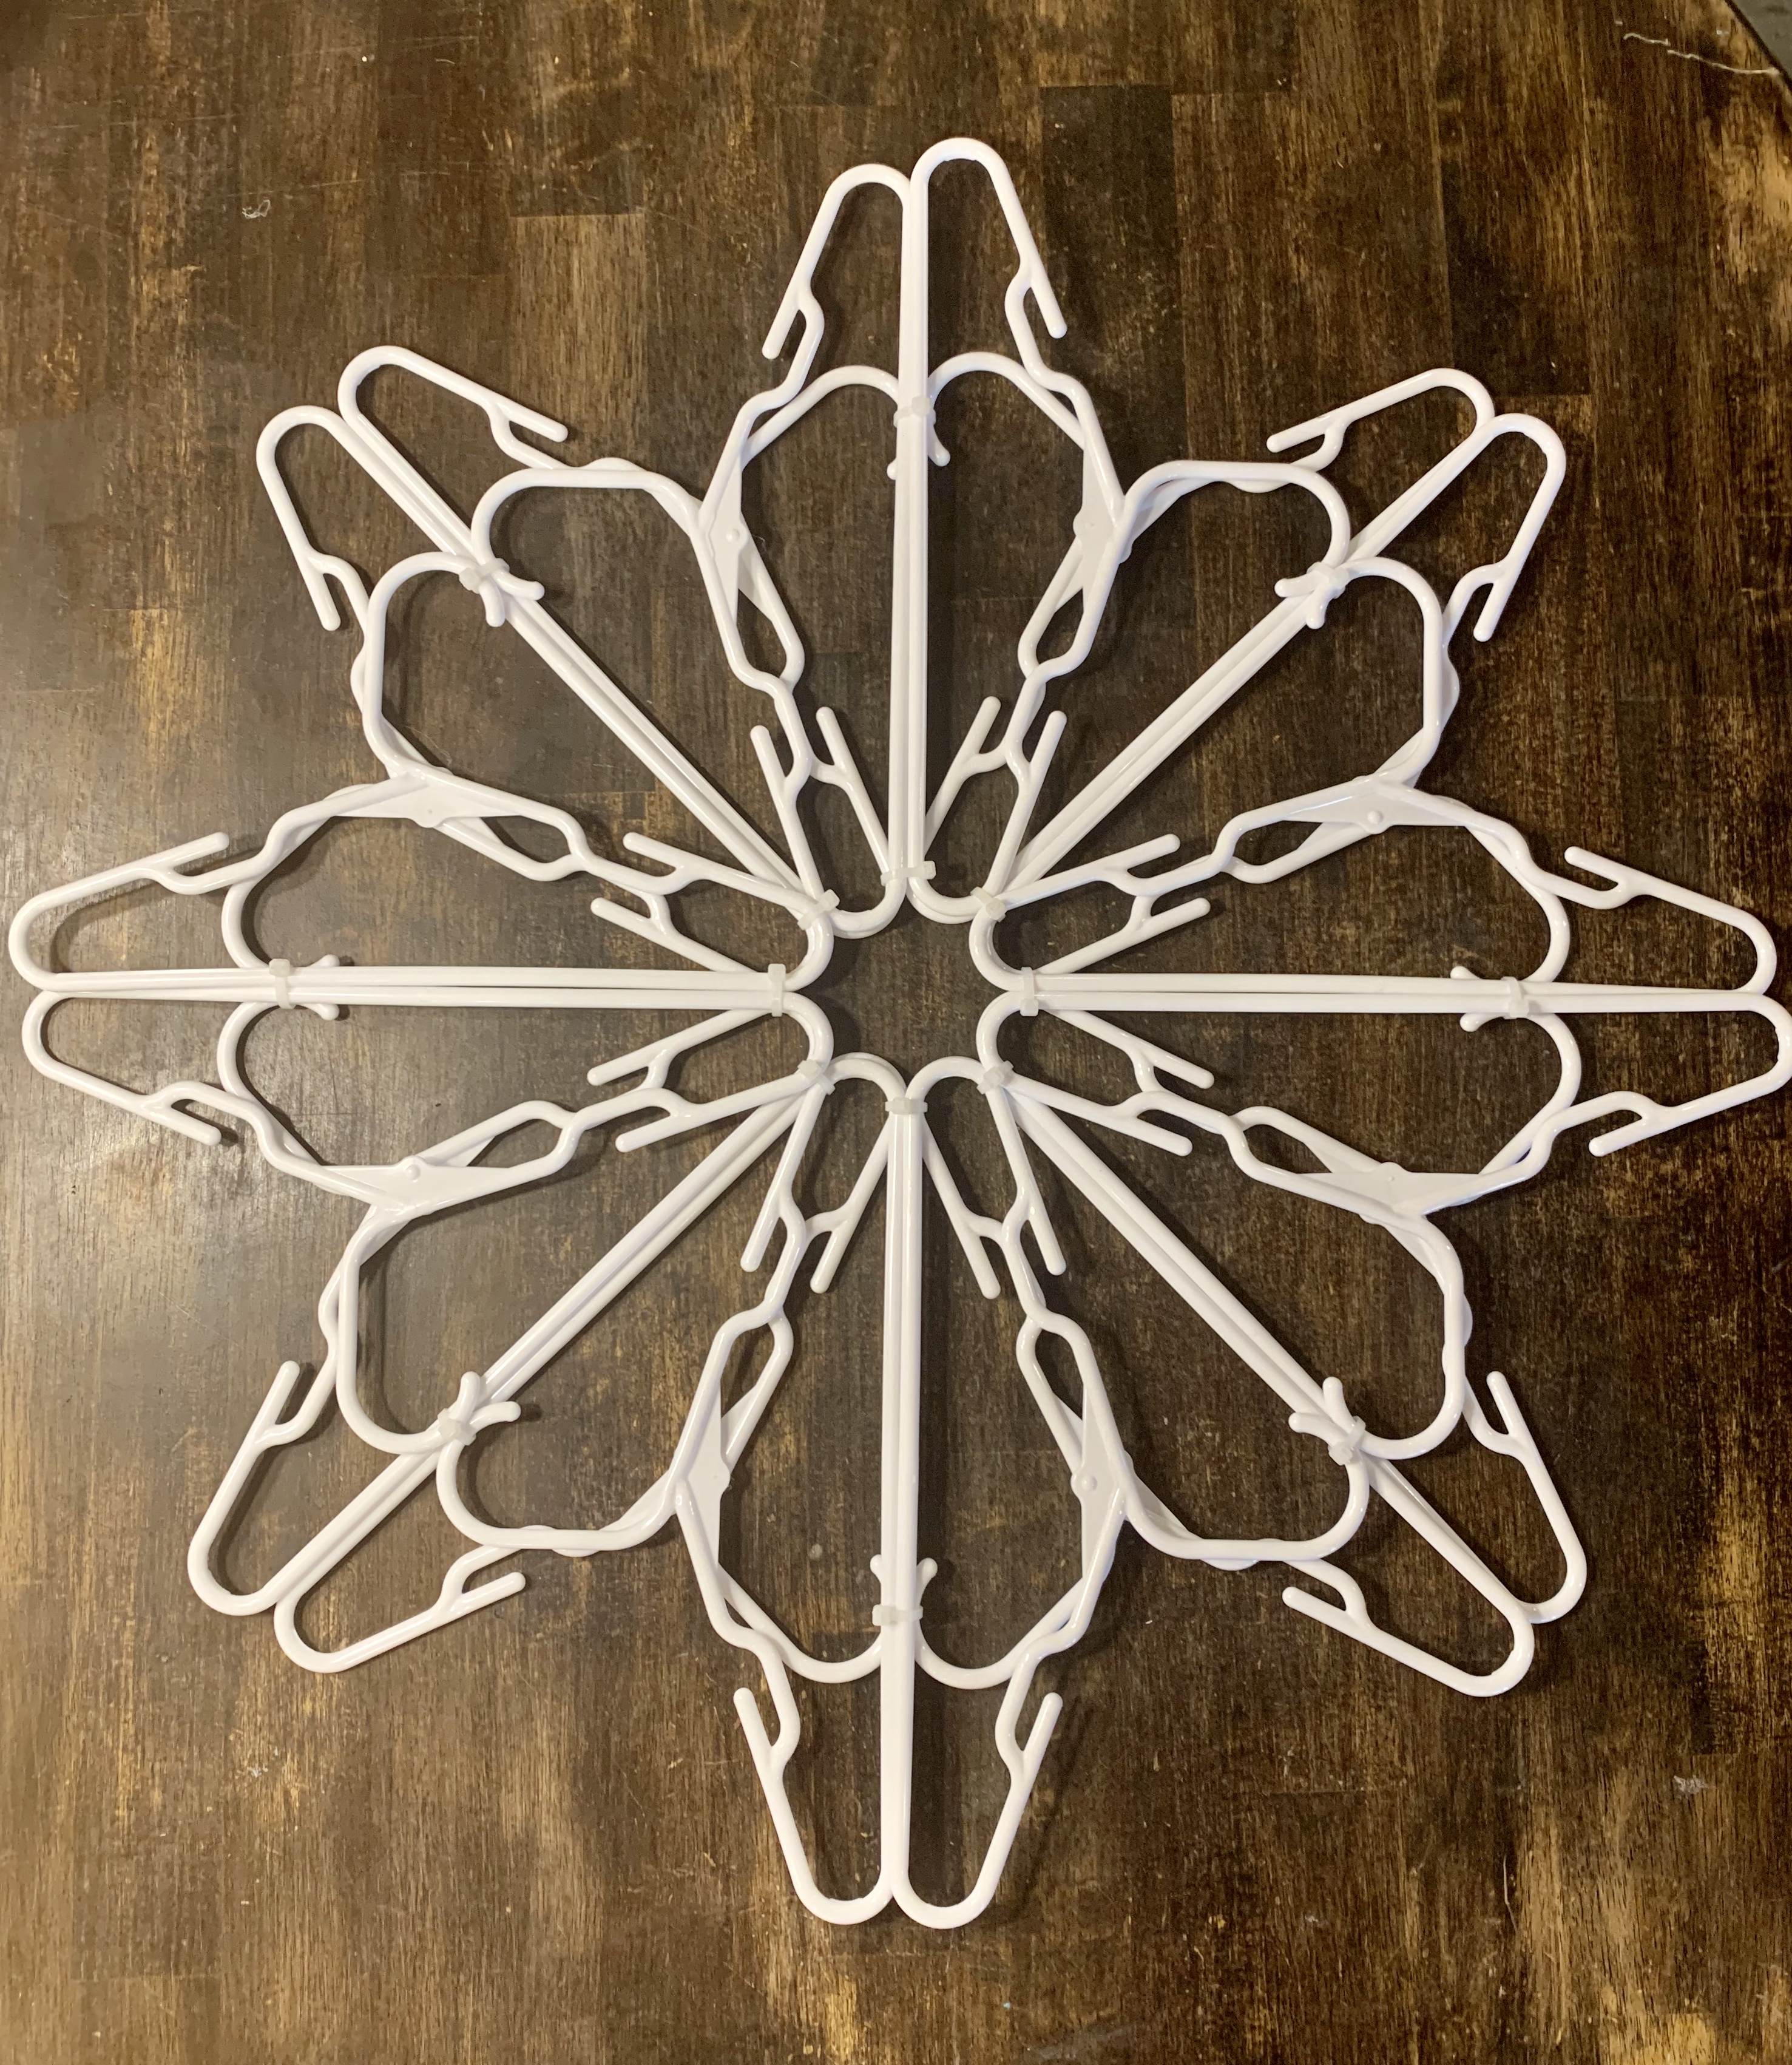
Repeat the process listed above with eight more hangers. But this time, when you place the pairs, place them so that they fit in between the already-arranged hangers. Basically, you’re going to create another snowflake out of hangers that goes the opposite way so that it fills the snowflake out nicely. The image below will help you if you need any clarity.
Step Three
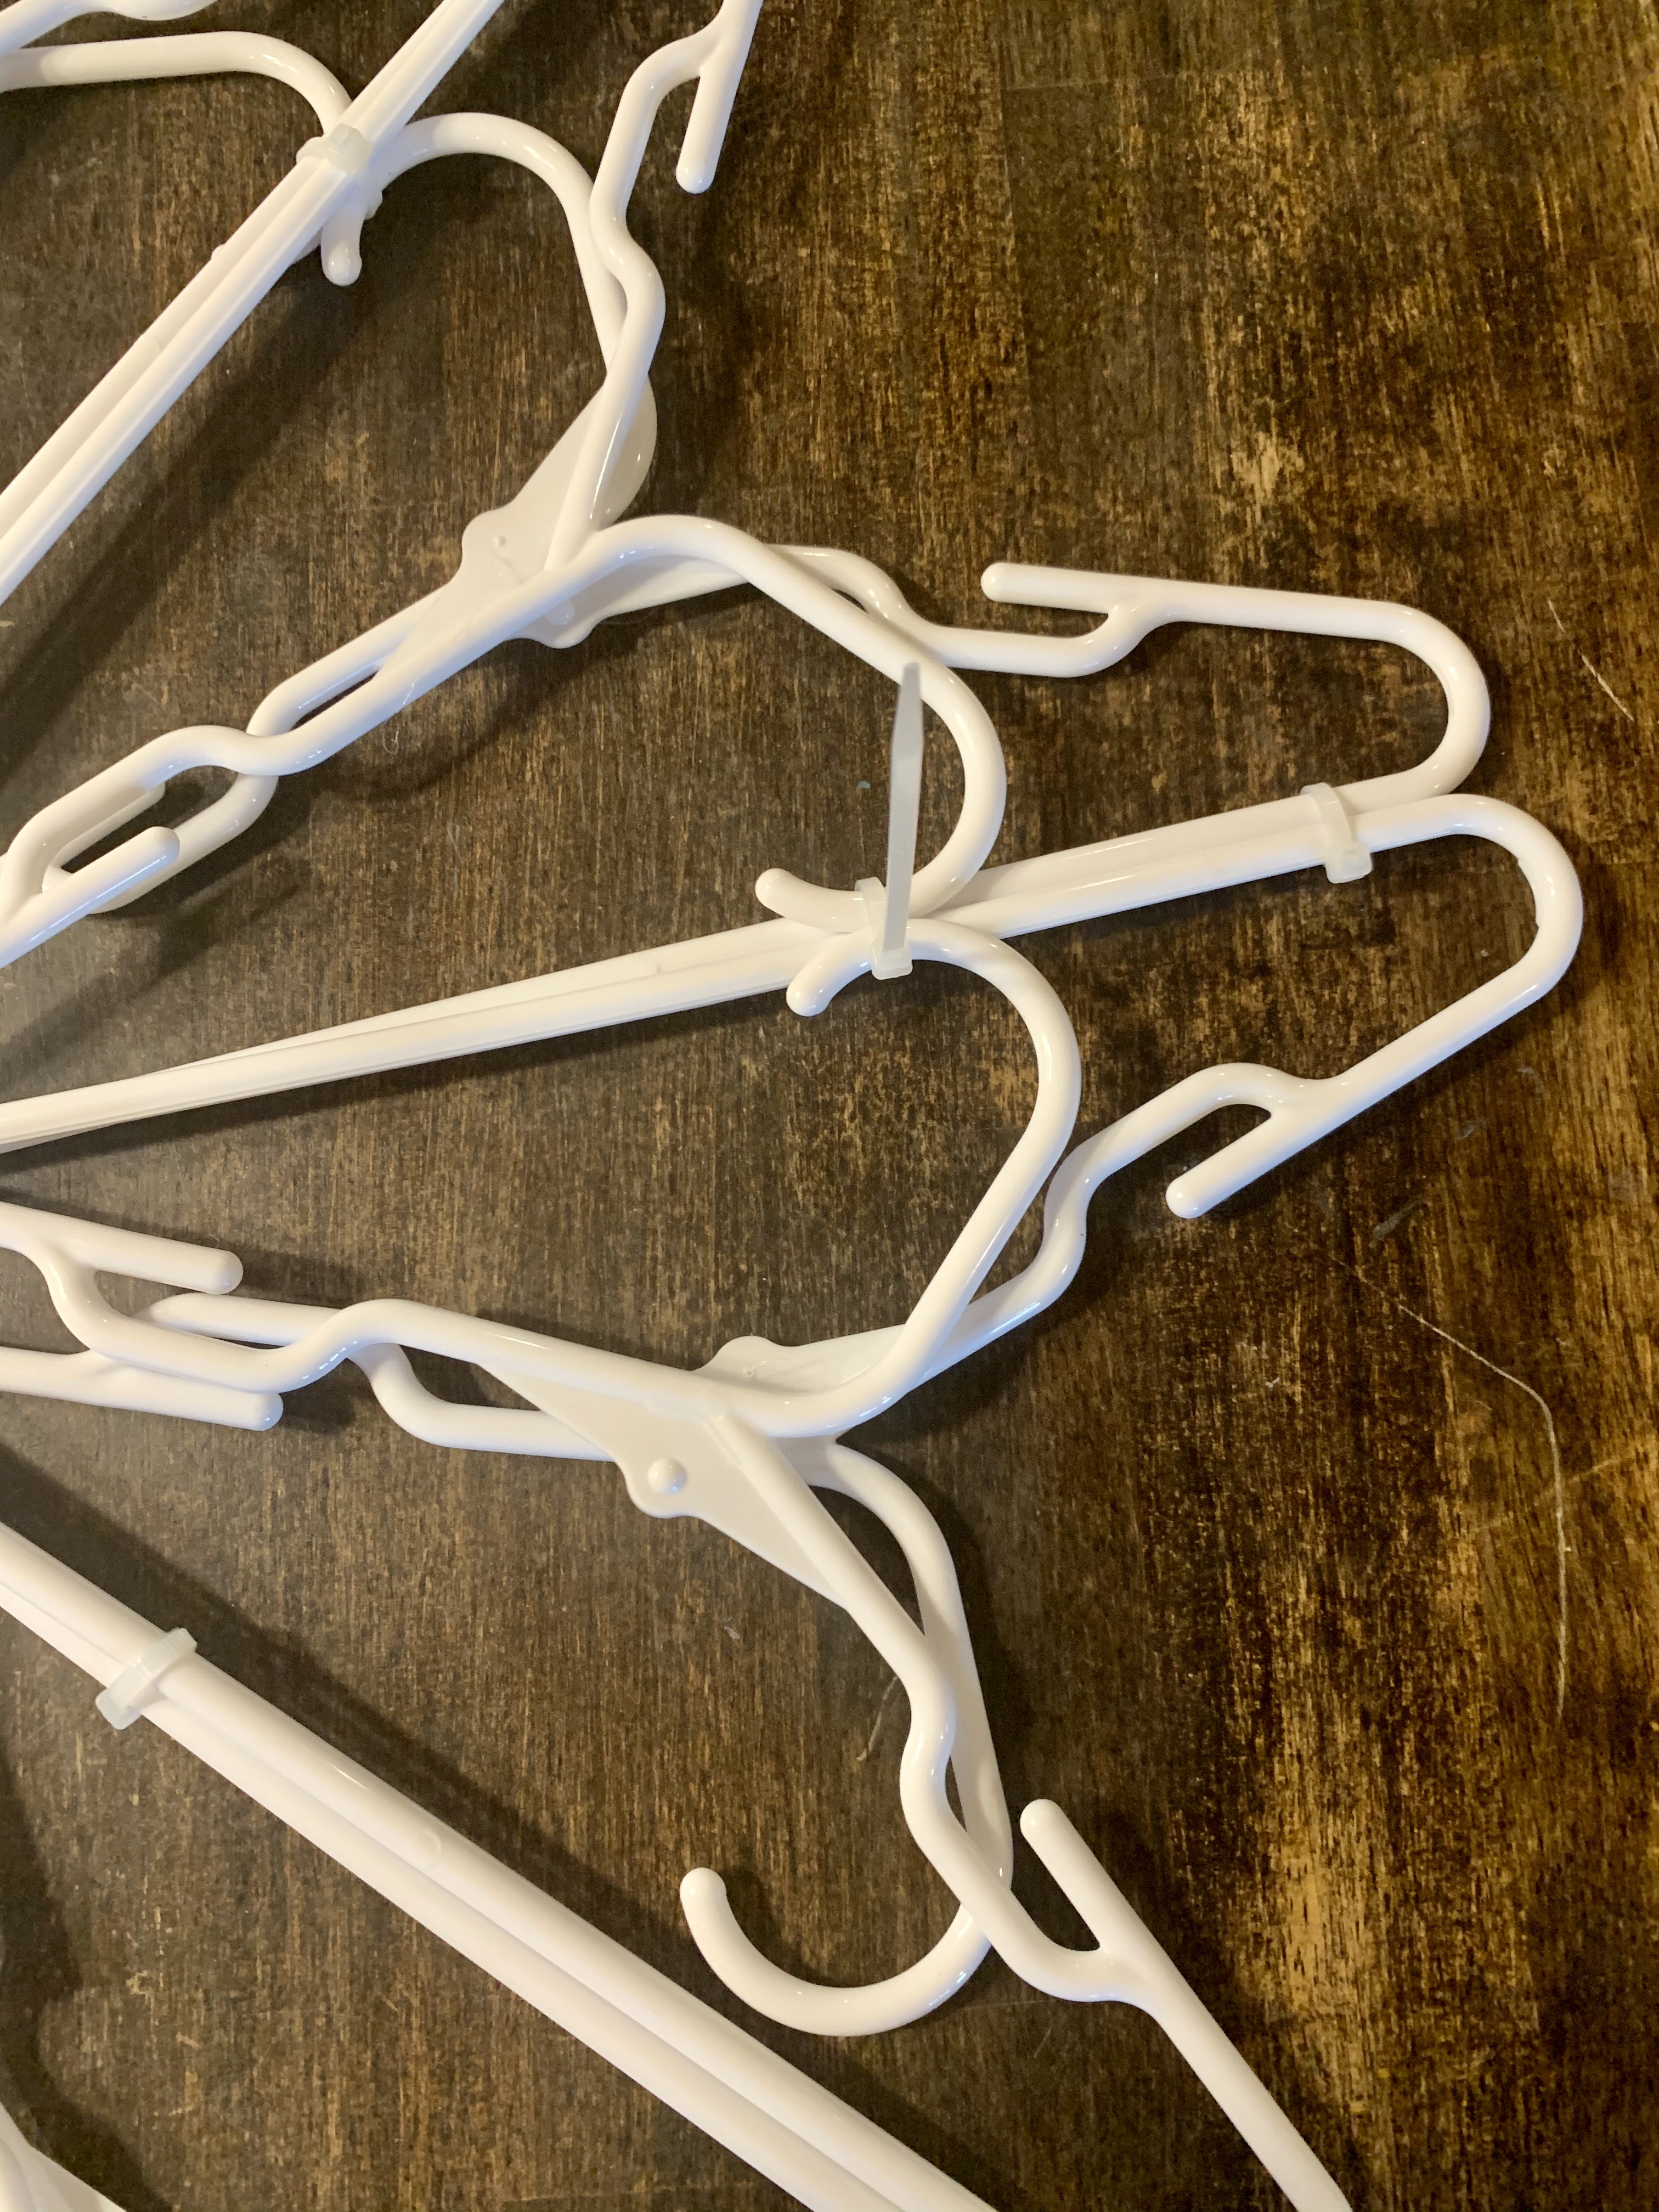
Zip tie the center of the snowflake together where the hangers all meet. However, don’t pull the zip ties tight just yet, leave them pretty loose, with the end untrimmed for the time being. Next, apply zip ties where the hooks of the hanger meet the other snowflakes. Once all of the zip ties are in place, you can begin tightening them down and then cutting off the long ends. Make sure all of your hangers are perfectly in place before tightening the ties! This will be the backside of your project. Check out how I assembled mine with the photo below if clarification is needed.
Step Four (optional)
Now, this is the fun part! Take your snowflake somewhere with good ventilation (an open garage would be perfect) and coat the project in a layer of spray paint. You can pick whatever color you’d like, but I recommend something like a metallic silver to really make your project look like Christmas. Once the paint has dried, you can cover your hangers in a layer of Mod Podge and then sprinkle with glitter. Finish off the project with some accessories that cover the zip ties, such as buttons or ribbons. Weren’t these Dollar Tree DIY hanger snowflakes incredibly easy to create? I thought so!
For a smaller snowflake, used kids sized hangers! I hope you enjoy your DIY hanger snowflakes.

We made a plastic coat hanger snowflake. I really like how it turned out. Thank you for the idea. We put a set of Christmas lights on the snowflake
Oh what a cute idea 🙂 I’m glad you like the way it turned out!
I have made 2…one adult size and 1 child size…wish I could add pictures to show you!